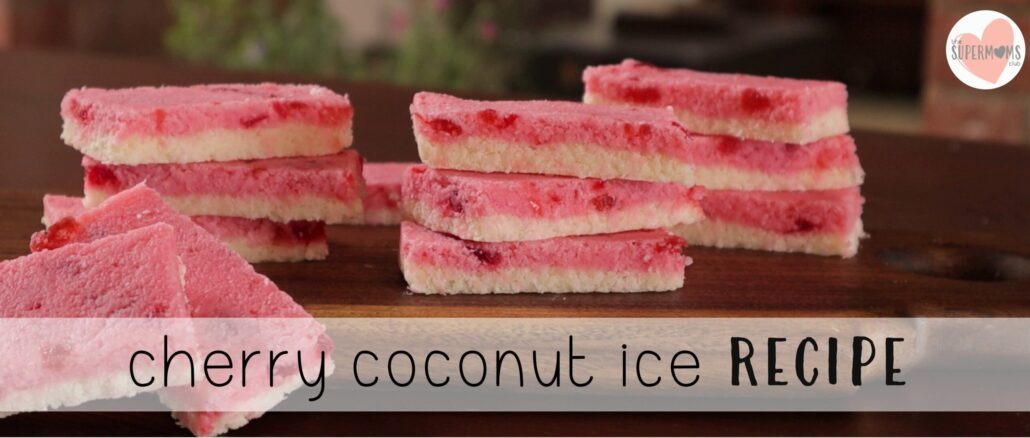
This Cherry Coconut Ice recipe is a great variation to plain coconut ice. It’s no bake, it’s super easy to throw together, and it takes around 10 minutes to make! I have 4 other variation too, which you can grab from the bottom of this post!
Watch On YouTube
Cherry Coconut Ice Recipe
A quick video with recipe instructions and top tips to help you through!
Cherry Coconut Ice Recipe
Copyright © 2022 – This original recipe is by Taryn Bloem – thesupermomsclub.com
Prep Time: 10 minutes
Yield: 15cm X 15cm tin for thicker squares
or 20cm X 20cm tin for thinner bars
Ingredients:
2 cups icing sugar (confectioners sugar)
pinch salt
385g tin condensed milk
3 cups desiccated coconut
75g – 100g chopped glace cherries
pink food colorant
Method (for the cherry coconut ice):
Prep a baking tin with baking paper. You can either use a 20cm X 20cm tin (for thinner coconut ice bars), or a 15cm X 15cm tin (for thicker squares).
Sift the icing sugar and salt into a mixing bowl.
Pour in the condensed milk, and mix it until it’s combined.
Add the desiccated coconut, about a third at a time, and continue mixing until it’s incorporated.
Divide the coconut ice equally between 2 bowls (roughly 430g in each). Add the chopped glace cherries and colorant into one bowl, mixing them through evenly (you may need to mix it with your hands to achieve this).
Place the plain white coconut ice into your prepped tin, squishing it flat and ensuring it’s even. Using the backend of a spoon is a great way to get it even and tightly packed.
Then repeat this with the pink cherry coconut ice, creating 2 layers.
Place the tin into the fridge to set for an hour. Once set, cut it into squares (3,5cm X 3,3cm) or bars (4cm X 7cm), depending on the tin size you used to make it.
Store in an airtight container to keep fresh.
Enjoy!
Coconut Ice Variations:
LEMON COCONUT ICE: Replace the cherries and pink food colorant with 50g chopped glace peel, 1 tsp lemon essence & yellow food colorant.
PINEAPPLE COCONUT ICE: Replace the cherries and pink food colorant with 75g chopped glace pineapple, 1 tsp pineapple essence & yellow food colorant.
STRAWBERRY COCONUT ICE: Replace the cherries with 40g dried strawberry fruit flakes (Montagu make them) and 1 tsp strawberry essence.
MINT COCONUT ICE: Replace the cherries and pink food colorant with a 49g bar of Nestle Peppermint Crisp (chopped), 1 tsp mint essence & green food colorant.

Cherry Coconut Ice Recipe
Equipment
- 1 15cm X 15cm square baking tin (for 3,5cm X 3,5cm thicker squares)
- 1 20cm X 20cm square baking tin (for 4cm X 7cm thinner bars)
Ingredients
Ingredients:
- 2 cups Icing Sugar / Confectioners Sugar
- pinch Salt
- 385 gram Tin Condensed Milk
- 3 cups Desiccated Coconut
- 75 grams Chopped Glace Cherries
- Pink Food Colorant
Instructions
Method (for the cherry coconut ice):
- Prep a baking tin with baking paper. You can either use a 20cm X 20cm tin (for thinner coconut ice bars), or a 15cm X 15cm tin (for thicker squares).
- Sift the icing sugar and salt into a mixing bowl.
- Pour in the condensed milk, and mix it until it's combined.
- Add the desiccated coconut, about a third at a time, and continue mixing until it's incorporated.
- Divide the coconut ice equally between 2 bowls (roughly 430g in each). Add the chopped glace cherries and colorant into one bowl, mixing them through evenly (you may need to mix it with your hands to achieve this).
- Place the plain white coconut ice into your prepped tin, squishing it flat and ensuring it's even. Using the backend of a spoon is a great way to get it even and tightly packed.
- Then repeat this with the pink cherry coconut ice, creating 2 layers.
- Place the tin into the fridge to set for an hour. Once set, cut it into squares (3,5cm X 3,3cm) or bars (4cm X 7cm), depending on the tin size you used to make it.
- Store in an airtight container to keep fresh. Enjoy!
Video
Back to TRIED AND TESTED RECIPES
Visit My YouTube Baking Vlog Channel


Be the first to comment